Showing posts with label entree. Show all posts
Monday, June 28, 2010
Wild Mushroom Soup
On my twenty-third birthday last year, I received a TON and I really do mean A TON of cookbooks. In a sense, I'm pretty easy to shop for--I can walk down the food and dining section of Barnes & Noble and find 30 or so specialty cookbooks in a heartbeat. Too much? What's too much?
This recipe comes from one of those cookbooks--400 Soups by Anne Sheasby--and is easily one of my favorite out of the full 400: Wild Mushroom Soup. The original calls for a several ounces of shitake mushrooms and soaking them in water; after the soaking process, you drain the mushrooms, roast them, and re-use the shitake water for part of your broth.
Although shitakes are great (they really do add a certain je ne sais quoi to any recipe), you can easily substitute this ingredient withe one cup portobello mushrooms as I have done below. This recipe is earthy, smooth, and so flavorful that it requires very few seasonings. Make this during winter (or summer!) for a soup that is clearly delicious.
Wild Mushroom Soup
* 3 cups chopped Bella Mushrooms
* 5 cups beef broth
* 3 cloves garlic, pressed
* 2 leeks, thinly sliced
* 1/2 white onion, chopped
* 2/3 cup heavy cream
* salt and pepper to taste
* 1 teaspoon thyme
1.) First, measure out all of your ingredients--mushrooms, onions, garlic, and leeks.
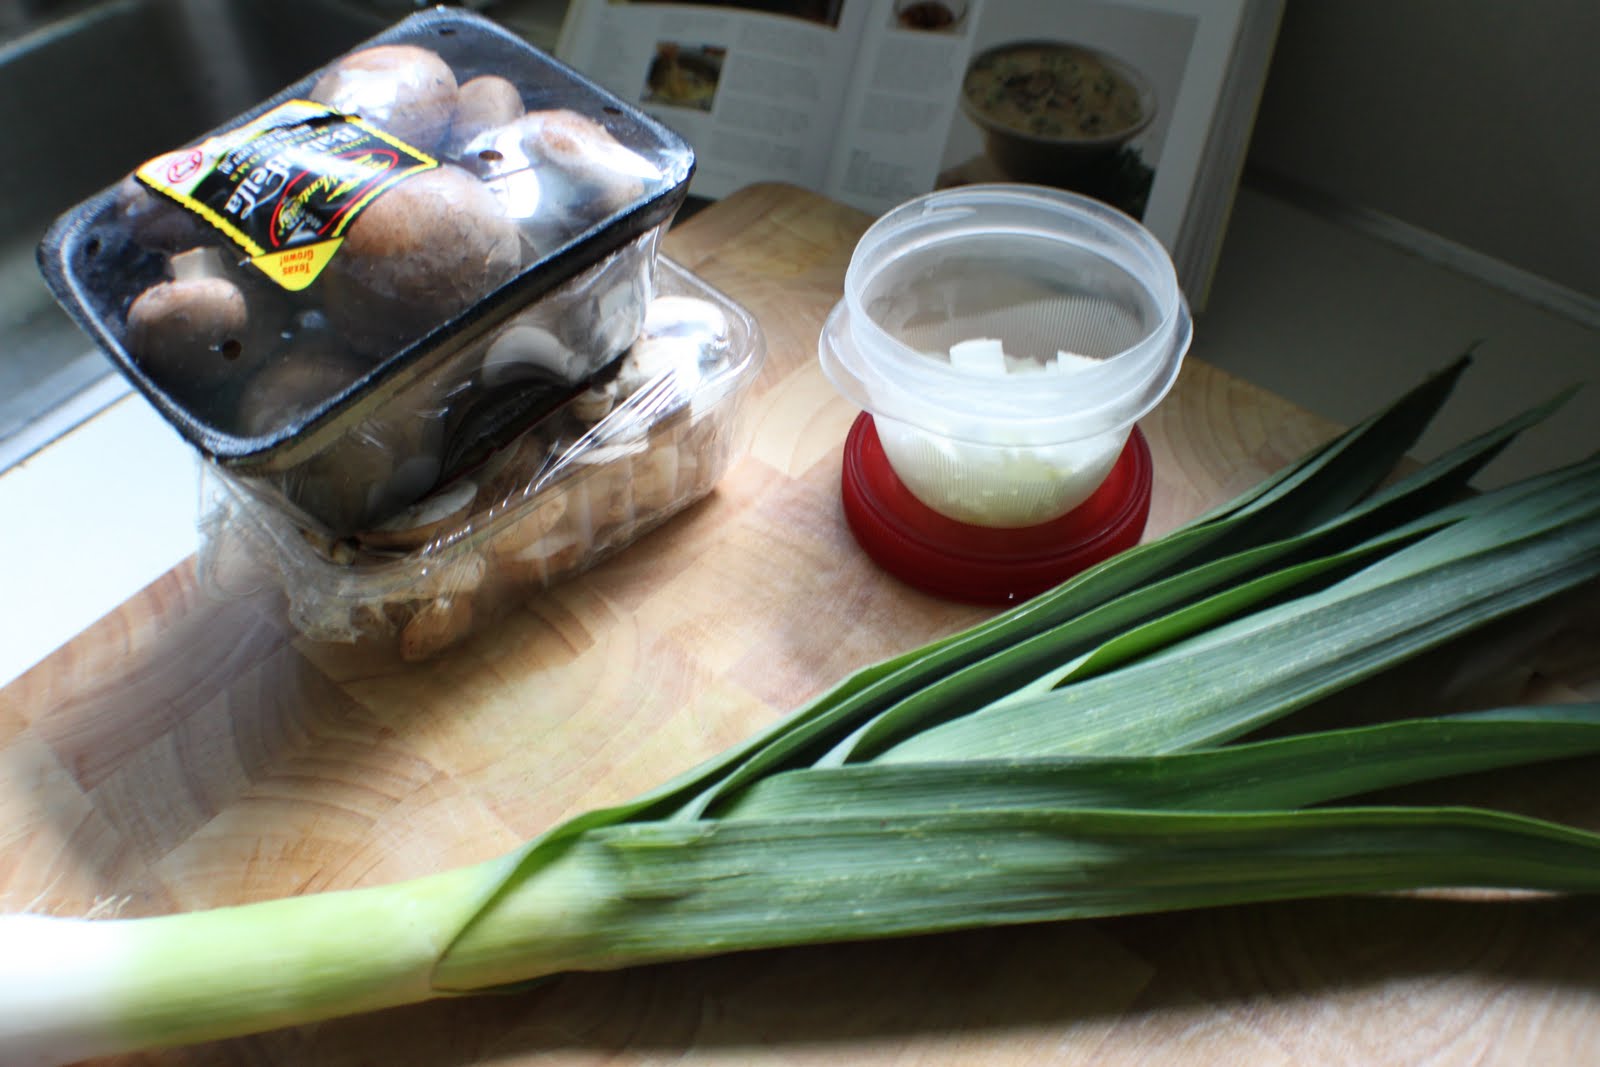
2.) Then, prep your ingredients--wash and thinly chop the leeks.
3.) Wash portobello mushrooms and thinly slice.
4.) Roughly chop mushrooms.
5.) Chop half of an onion, and peel several cloves of garlic. Set aside.
6.) Combine olive oil and butter in a large pot and warm.
7.) Add leeks, onions, and pressed garlic; simmer for 5-7 minutes.
8.) Add mushrooms and allow to simmer for several minutes, or until properly moist.
9.) Add beef broth and bring to a boil.
10.) Turn heat down to medium and allow to simmer in a half covered pot for 30 minutes. Season with salt, pepper, and 1 teaspoon thyme.
11.) After 30 minutes, remove 3/4 of the soup and puree in a food processor or blender.
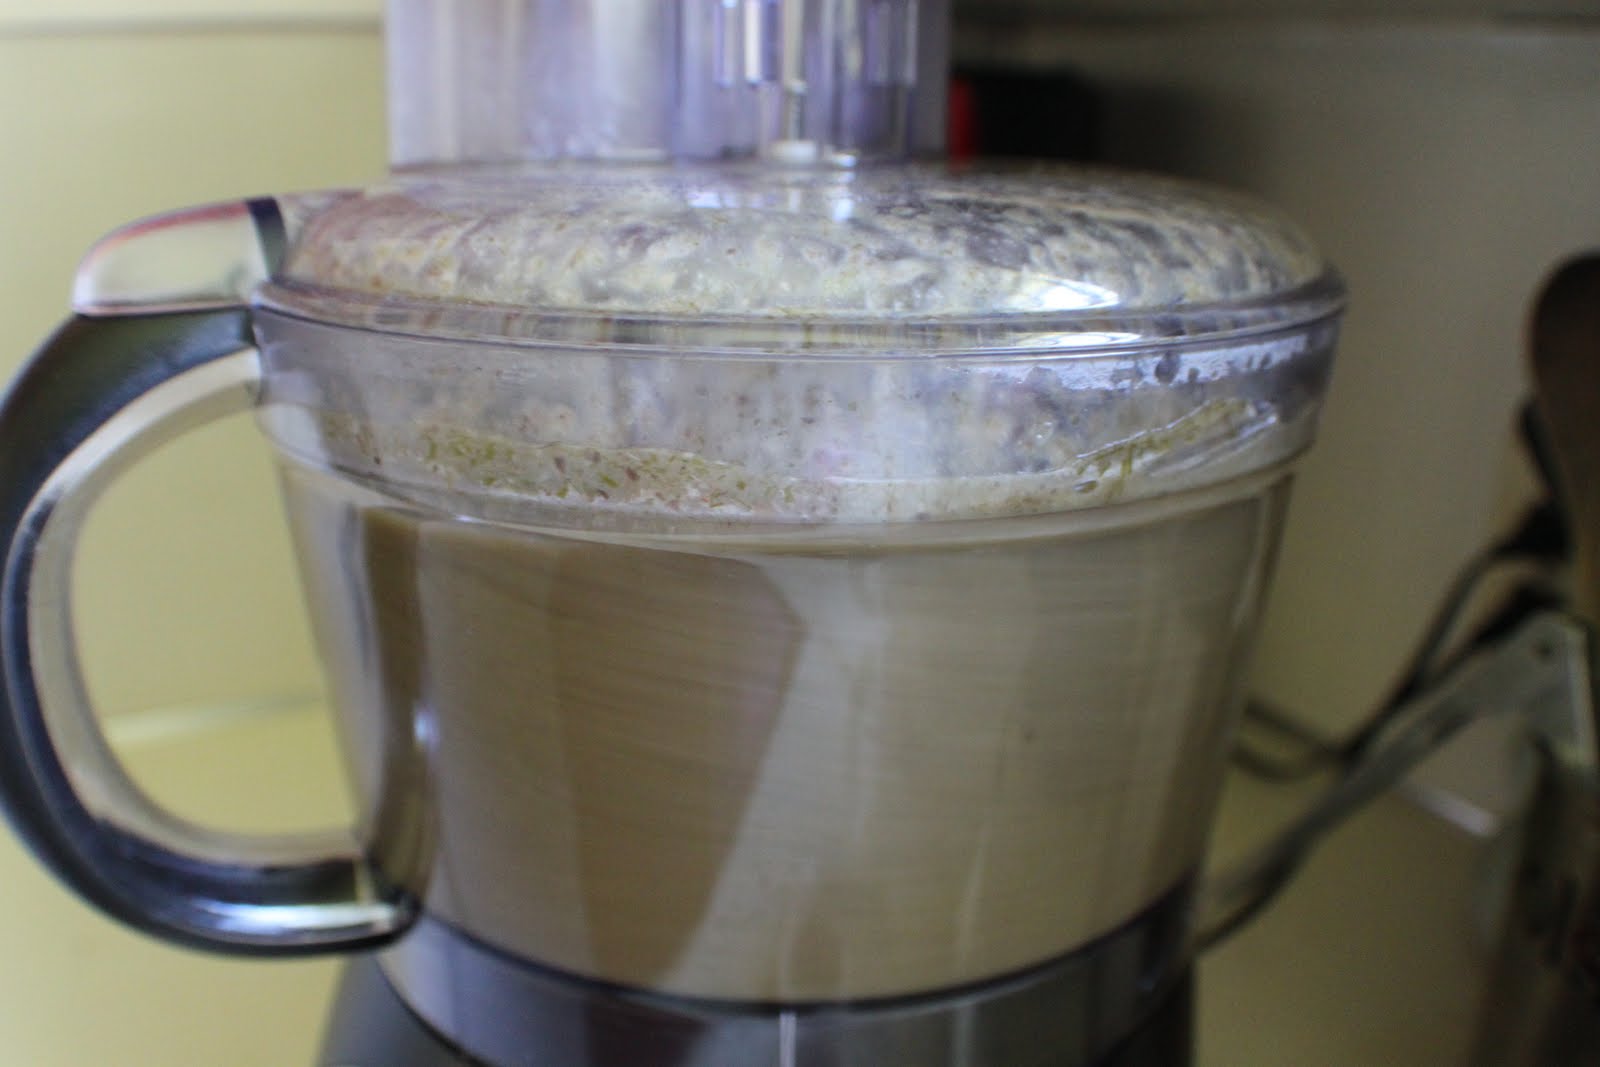
12.) Return to mushroom soup pot.
13.) Add 2/3 cup heavy whipping cream and return to a light boil. Turn off heat.
14.) Serve with fresh thyme sprigs and enjoy!
Subscribe to Clearly Delicious by Email
Labels:
cream,
easy,
entree,
mushrooms,
portabella mushrooms,
roasted vegetables,
side dish,
soup,
vegetarian
Friday, June 25, 2010
Portobello Veggie Burger w/Sprouts & Grey Poupon
I like some weird foods. I also like really healthy foods. Liking really healthy foods AND really weird foods make for the strangest--albeit delicious--of combinations. This recipe is just one of those hybrids--it combines my love for low-calorie lunches with extremely fresh, but healthy veggie ingredients: portobello mushroom caps, sprouts, and black bean veggie burgers. Soooo clearly delicious.
Yet, what's unique (and somewhat showy) about this recipe is that the oversized portobello mushroom caps are not only one of the main ingredients, but also act as buns to this veggie burger treat.
Portobello Veggie Burger w/Sprouts & Grey Poupon
This recipe originated with an episode of the Biggest Loser with chef Curtis Stone. Stone created these veggie delights as a way of cutting carbs and replacing their absence with flavorful nutrients. If the original recipe from Stone is followed exactly (you can find it here), one will only be eating 280 calories per serving! Can you believe that? 280 calories? Good Golly. You could eat 2 of these and bottom out with the amount of calories in 1 regular meat-lovin' burger. Seesh.
My recipe is a little different. Although it does not call for the sauce Stone makes (a delicious creamy chive sauce worth trying with a direct link above), it calls for a more intuitive preparation--make a veggie burger the way you always would make it and replace the buns with portabella mushrooms.
Ingredients:
* 2 large portobello mushroom caps
* 1 black bean veggie burger (I use Morning Star Farms, but feel free to use Boca Burgers, or other veggie burger)
* 1-2 tablespoons grey poupon
* 1 small handful sprouts
* 1 slice cheddar cheese
* 1 tablespoon olive oil
* salt and pepper to taste
Special Equipment Needed:
Foreman Grill
1.) Begin by preparing the portobello mushroom caps: wash mushrooms, remove stems, and rub with olive oil and fresh pepper and salt to taste.
2.) Grill portobello caps on a Foreman Grill. Mushrooms will be done when they've flattened in size and released their natural juices--the grilling process forces mushrooms to push their natural moistness to the outside skin. It's delicious.
3.) Grill second mushroom cap. Once both mushroom caps are done, add veggie burger to grill and grill.
4.) Now, create the sandwich: add cheese to one mushroom cap (flat side/underside), and spread other mushroom cap with 1-2 tablespoons of Grey Poupon. Sprinkle with a small handful of sprouts, and press sandwich together. Makes 1 serving.
Subscribe to Clearly Delicious by Email
Labels:
entree,
healthy,
low calorie,
low carb,
lowfat,
mushrooms,
portabella mushrooms,
portobello mushrooms,
vegan,
vegetarian
Wednesday, June 23, 2010
Butter Chicken
People who know me know that I love Indian food. Curry is one of my favorite spices to cook with and I have a ton of recipes available on Clearly Delicious that take advantage of said spice (see Curry in a Hurry and Curry Rice).
When my friend Lydia first introduced me to a recipe in the Curry family called "Butter Chicken" or "Murg Makhani," I knew that it had to be clearly delicious--consisting of cloves, cinnamon, peppercorns, cumin, and much much more, the sauce and chicken combination promised a full bodied flavor that was melt-in-your mouth authentic in the Indian cuisine family.
Although the name of this recipe "Butter Chicken" suggests a sauce that is primarily butter based, the name is indeed a misnomer--instead of being butter based, the sauce consists of greek yogurt and tomato sauce with melted butter added at the end (2 tablespoons). This recipe is significantly healthier than one might think. Regardless of its name, the sauce is a creamy, flavorful, mildly spicy sauce-based dish served over white or brown rice.
Butter Chicken
Lydia found this recipe on the About.com website (recipe can be found here). The recipe is written by Petrina Verma Sarkar, one of the About.com Indian food writers. Follow the below recipe for an authentic, tasty Indian entree, but if you can't find a couple of the exact spices (i.e., kasuri methi), don't worry too much--the other spices easily balance out one or two missing spices.
Ingredients:
* 1 kg boneless chicken skin remove
* Juice of 1 lime
* Salt to taste
* 1 tsp red chilli powder (adjust to suit your taste)
* 6 cloves
* 8-10 peppercorns
* 1 inch stick of cinnamon
* 2 bay leaves
* 8-10 almonds
* Seeds from 3-4 pods of cardamom
* 1 cup fresh yoghurt (must not be sour)
* 3 tbsps vegetable/canola/sunflower cooking oil
* 2 onions chopped
* 2 tsps garlic paste
* 1 tsp ginger paste
* 2 tsps coriander powder
* 1 tsp cumin powder
* 1/4 tsp turmeric powder
* 1 can (400g or 14 oz) of tomato paste
* 1/2 litre chicken stock
* 2 tbsps kasuri methi (dried fenugreek leaves)
* 3 tbsps unmelted, soft butter
* Salt to taste
* Coriander leaves to garnish
Other Accompanying Dish:
* Prepare 6-7 servings white, or brown rice. (Note: I use a handy-dandy, rice cooker. I'll never have to wait for water to boil again!)
1.) Begin by marinating the chicken: add the juice of one lime and 1 tsp chili powder in a bowl with the chicken. Mix and cover the chicken thoroughly; wrap with plastic wrap and refrigerate for one hour.
2.) Roast cloves, peppercorns, cinnamon, bay leaves, and almonds till lightly dark. Cool and add cardamom seeds. Grind until powder in a coffee grinder.
3.) Mix yogurt with the above ground spice powder with cumin, coriander, and turmeric. Add to chicken mixture. Mix thoroughly and allow to refrigerate for another hour.
4.) When chicken mixture has marinaded for an hour, sauté onions in a saucepan with a tablespoon of olive oil (or butter) until golden brown and translucent. Add garlic paste and ginger. Sauté for one more minute.
5.) Add chicken and cook with garlic/ginger/onion mixture. Chicken should be browned, but not cooked completely (you'll want to finish cooking the chicken in the sauce with the next step).
6.) Once chicken is thoroughly cooked, add tomato paste, chicken stock, and remaining yogurt sauce mixture. Cook till chicken is tender and sauce has reduced by one half.
7.) Melt butter in separate saucepan and pour over chicken and sauce mixture.
8.) Mix to integrate and pour sauce mixture in a deep serving pan. Serve with white or brown rice. Makes 5-6 servings. Enjoy!
Subscribe to Clearly Delicious by Email
Labels:
asian,
butter chicken,
chicken,
cinnamon,
cloves,
cumin,
entree,
indian,
main course,
peppercorns,
spice,
spicy
Tuesday, June 22, 2010
Curry Rice
Friday night we decided to cook a nice dinner for Joe (who was leaving for a month of training with the army in the woods...somewhere...in America). In Clearly Delicious style, we sent him off with a delicious assortment of Indian cuisine--Butter Chicken, Edamame, Na'an, and of course, Curry Rice.
This Curry Rice is loaded with healthy veggies, natural remedy ingredients such as honey and olive oil, and makes for one heck of a fulfilling Indian rice dish. Make as a side dish, or as an entree (hot or cold) and you will have treat equally Indian and clearly delicious.
Curry Rice
This recipe comes from Elise's blog, Simply Recipes, and can be found here. Elise suggests in the original to serve the rice dish cold, but I find the combination of warm rice, honey, and freshly cooked vegetables to demand being served hot. Regardless, serve hot or cold for a curry rice dish that is healthy, flavorful, and extremely clearly delicious.
Ingredients:
* 4-5 cups cooked brown, or white rice
* 1 onion, chopped
* Curry paste, or powder, to taste (Elise suggests yellow, or red, but not green, and NOT Thai)
* Olive oil, to taste
* Cumin, to taste
* Chili powder, to taste
* Sesame oil, to taste (optional if unavailable)
* 1/4 cup cilantro, chopped
* 1 cup raisins
* 1 apple, cored and chopped
* Honey, to taste
* Salt, to taste
* 2 celery stocks, washed and chopped
* 1 cup edamame, cooked
* 1/4 bell pepper (red), chopped
* 1/4 bell pepper (green), chopped
1.) Prepare rice and set aside.
2.) Prep your ingredients: chop the bell pepper, onion, celery, and apple. Set aside.
3.) Begin by sautéing onions in olive oil. Sprinkle with curry powder/paste to preference and cook until translucent.
4.) Bring a pot of water to a boil and cook the edamame separately while onions are browning. (For more information on how to cook edamame, see the "Edamame with Thyme" post).
5.) Add remaining chopped vegetables--peppers, celery. Cook for several minutes until all vegetables are soft, but still retain a certain amount of crunch (the al dente of the veggie community if you will).
7.) Now prepare the rice dish. Place rice in an oversized mixing bowl (trust me, you'll need it!), and add the cooked vegetables.
8.) Add 1 cup raisins and drizzle with honey to taste.
9.) Add chopped apple and mix to combine. Season to taste preferences with additional curry, salt and pepper, cumin, olive and sesame oil, cilantro, and chili powder. There are few measurements on this recipe as everyone's taste palette is especially different when combining the salt and pepper with the sweet of apples, raisins, and honey.
Subscribe to Clearly Delicious by Email
Thursday, June 17, 2010
Crab Cakes
Crab Cakes--one of the tastiest, most savory dishes I've ever had (and I've had a LOT of different cuisines!). Most people eat crab cakes in restaurants for their seafood novelty, but rarely, and I really do mean RARELY, does an American family make this dish at home. Why? Well, they can be a tough crab to crack if you know what I mean. Most homemade crab cakes fall a part or taste funny (probably from the use of imitation crab instead of the real crustacean) and the dish becomes a "professionals know best" seafood cuisine item instead of a clearly delicious homemade treat.
Thus, the key to making a successful crab cake lies on two essential, crucial, imperative, requisite, fundamental (GET IT? these two points are really important) facts: 1.) all crab cakes must be made with REAL crab. None of that fake, man-made red dye #4 crap, and 2.) all crab cakes should be baked in the oven (not fried).
If you agree to these terms, then follow to the next paragraph.
I was inspired to make this recipe while running in the gym last week: Guy Fieri was visiting a diner where a behind-the-scenes cook was making Crab Cakes in massive quantities (I think the recipe yielded something like 32-33 cakes!). Guy kept asking him, "and you're sure these aren't going to break apart?" to which the cook responded, "OF COURSE NOT. We're baking them in the oven." Guy was impressed, I was impressed, and I dare say this recipe is straight up IMPRESSIVE. Although I do not have Guy's recipe exactly, my method and ingredients are pretty similar. Make this as an entree in large quantities (recipe yields about 8 cakes), or an appetizer with smaller servings.
Crab Cakes w/Spice
There is no exact source for the creation of this recipe. As always, I consulted Elise's blog Simply Recipes to get an idea of what works, but I ended up blending a combination of her spices/measurements with some of my own preferences. See Elise's Spicy Crab Cakes recipe here, or Regular (first attempt at) Crab Cakes here.
NOTE: The key is NOT to pan fry the crab cakes. I don't care how much you know about what you're doing, it's just NOT going to work. Bake them in the oven for less work (and stress) and you'll have a dish that impresses everybody.
Ingredients:
* 1 lb real crab meat (I got mine from Whole Foods at $20 a lb. A bit pricey, but definitely worth it for a once in a while dish)
* 1/2 small onion, chopped
* 1/4 of a red bell pepper, chopped
* 1/4 of a green bell pepper, chopped
* 1 teaspoon coarse salt
* 1 tablespoon butter
* 2 large eggs
* 2 teaspoons Worcestershire sauce
* 1 teaspoon paprika
* 1 teaspoon freshly ground black pepper
* 2 tablespoons mayo (spicy mayo if you have it)
* bread crumbs, for dusting
* 2 slices of Whole Foods Seeduction bread, torn, or chopped into small pieces
* 1/4 cup parsley, chopped
* 2 teaspoons lemon juice
* 2 tablespoons Grey Poupon Mustard
* 1/2 teaspoon fresh, or ground thyme
1.) Prep all of your ingredients: chop the bell peppers, parsley, and onion and measure your spices.
2.) Sauté onion for several minutes in 1 tablespoon butter and 1 teaspoon coarse salt.
3.) Add peppers and sauté until slightly browned and translucent (onions). Remove from heat and allow to cool.
4.) Prepare batter: combine eggs and spices.
4.) Whisk to combine. Add cooled onions and pepper mixture.
5.) Add crab meat and gently fold meat into batter.
6.) Add seeduction bread chunks and fold into crab and spice batter.
7.) Once your batter is prepared, it should look similar to a crab salad, only with significantly more hardiness to it:
8.) Now, the fun part! You are ready to make the actual cakes. Begin by lightly dusting a baking sheet with bread crumbs.
9.) Grab a small handful of the crab mixture and shape into a ball.
10.) Place on dusted baking sheet and press down lightly so that the crab cakes are not perfectly circular balls, but rounded discs.
11.) Dust lightly with bread crumbs and refrigerate until you're ready to cook them (for me, it was about 30 minutes).
12.) Cook in a 350F oven for 25-30 minutes, or until cakes are golden brown. Remove from oven, allow to cool for several minutes, and enjoy! Makes 8 servings, or 4 double servings. Serve with Elise's Horseradish Mayo Recipe or Tyler Florence's Remoulade.
Subscribe to Clearly Delicious by Email
Labels:
bell peppers,
bread crumbs,
Cajun,
crab,
crab cakes,
crab meat,
Creole,
easy,
entree,
Seafood
Wednesday, June 16, 2010
Shrimp Etoufée
Living in Louisiana comes with certain culinary expectations: you begin using crawfish in many of your dishes, you learn how to make a roux, you invest time and money in learning how to fry a turkey, prepare a crawfish boil, and the list goes on and on....
Sunday night, John and Mike (and Joe!) joined me for the True Blood premiere. Those of you familiar with the show know that it's set in "Bon Temps," Louisiana, a small town in backwoods LA where the residents embody a certain southern stereotype and fornicate with vampires, maenads, and well...fairies. Seeing as John is an extraordinarily well-recognized vampire specialist (check him out at Amazon here), it only seemed right to drink "bloody red wine" and prepare a very Louisiana dish: etouffée. Now, I had originally planned on making crawfish etouffée, but the Neighborhood Walmart by my house was out, so I picked up pre-cooked shrimp instead (a result of the oil spill in the Gulf, maybe?). Prepare with either shrimp, or crawfish, but crawfish tails add a little extra "Louisiana" to the dish.
What we prepared was creamy, spicy, and oh-so-Louisiana. Make this dish with freshly chopped ingredients, prepare a roux, and allow everything to simmer in Cajun spices. You will have a dish that's spicy (bot not too spicy) and clearly delicious.
Shrimp Etouffée
This dish is a combination of Emeril Lagasse's and Paula Deen's shrimp etouffée with a couple of tweaks (find the originals here and here). I didn't use quite the quantity of ingredients Emeril's calls for, but used Paula's instead. Yet, I used Emeril's overall technique and call for butter for the roux (Paula calls for oil, that crazy lady). When in doubt, see Emeril for how to cook Louisiana, but see Paula for quantity sizing.
Ingredients:
* 1 cup celery, chopped
* 1/2 red bell pepper, chopped
* 1/2 green bell pepper, chopped
* 4 garlic cloves, minced
* 1/2 cup parsley, finely chopped
* 1 stick + 3 tablespoons butter
* 1 tomato, diced
* 1 cup onions, chopped
* 1/2 cup flour
* 1 tsp pepper
* 1 tsp cayenne
* 2-3 tsps Cajun Seasoning, to taste (i.e., Tony's)
* 2 lbs shrimp, deveined and de-tailed
* 4-5 cups water
Other Accompanying Dish:
* Prepare 6-7 servings white, or brown rice. (Note: I use a handy-dandy, rice cooker. I'll have to wait for water to boil again!)
1.) First, do your prep-work by measuring out all of your ingredients--celery, tomato, onion, peppers, flour, parsley, and spices.
3.) Now, you're ready to make the roux. Begin by melting one stick of butter + 3 tablespoons butter in a saucepan. Note: cut butter into 1 inch cubes in order to melt faster.
4.) After butter is fully melted and has coated the pan, add 1/2 cup flour slowly: flour should be mixed in a little at a time to integrate properly and prevent lumping. This process creates what we call a "roux."
5.) Now, add your onions and celery. Sauté for about five minutes, or until tender, but with a little bit of crunch.
6.) Once celery and onions are tender-but-crunchy, add your bell peppers and tomato and mix in. Allow to cook for 1 minute.
7.) Once mixed properly, add garlic, parsley, and spices. Mix and add 2 1/2 cups water. Mix to create a creamy roux.
8.) Now, this final step is probably the trickiest, because it requires that you know what you're doing. Anyone who has had etouffée before knows exactly what the sauce/roux should look and taste like. Those of you new to making this dish will need to follow this rule of thumb: add 2 more cups of water and allow to simmer for a couple of minutes. The broth should be thick and creamy and not too watery. Add the shrimp and allow to cook for another couple of minutes and for spices to integrate. TASTE and adjust spices accordingly. If, however, at any point during this final step, the sauce begins to get thick and gloppy, or thick and sticky, add more water. The consistency you're looking for here is "creamy." The roux's flour + water + butter ratio is want to make a thicker sauce naturally (it's similar to making a batter), but it's your job to add enough water to keep the sauce from clumping, or globbing up.
9.) Now, remove from heat and serve over rice as this dish is clearly delicious.
Subscribe to Clearly Delicious by Email
Labels:
bell peppers,
Cajun,
celery,
comfort food,
crawfish,
Creole,
dinner party,
entree,
etouffee,
etouffée,
Louisiana,
onions,
red bell peppers,
roux,
roux sauce,
shrimp
Subscribe to:
Comments (Atom)


