Showing posts with label cookies. Show all posts

Saturday, June 19, 2010

Chocolate Oatmeal Pecan Cookies


On a pretty regular basis, I think to myself, "I have some really fantastic friends.  I'm a lucky girl."  Not to be a sap or anything, but it's true--I know some wonderful people.  When one of those wonderful people, Ms. Sarah Gregory, helped me out after making a rather goofy mistake, I decided that I would pay her back the best way I knew how: cooking.

Specifically, Sarah requested that I make her an Oatmeal Raisin Cookie recipe that I made her the first time we met, but with one major change: instead of raisins, Sarah wanted chocolate chips.  The result? A cookie that couldn't get any better--a melt in your mouth chocolatey, nutty, oaty experience that seems more like a meal than a delicious snack.  Make this recipe with the original raisins it calls for, OR with chocolate chips.

Chocolate Oatmeal Pecan Cookies
As always, this recipe pays tribute to the one and only Foodblogtress, Elise Bauer at Simply Recipes.  For her original version of this recipe, please see here.  I've adjusted some of her measurements and switched out the raisins for chocolate chips, but otherwise, this cookie is pretty much the same as the one she has listed from her grandmother.


Ingredients:
* 2 sticks butter, softened
* 1 cup brown sugar, packed
* 1 cup regular sugar
* 1 1/2 cups all purpose flour
* 3 cups rolled oats (not the instant kind)
* 1 1/2 cup raisins, OR chocolate chips
* 1/2 cup pecans, or walnuts (optional)
* 1 tablespoon vanilla extract
* 1/2 teaspoon almond extract
* 1 teaspoon salt
* 1 teaspoon baking soda
* 1/2 teaspoon nutmeg
* 1 teaspoon cinnamon
* 2 large eggs, beaten


1.) Preheat oven to 350F.  Grease cookie sheet(s) with butter and set aside.

2.) In a standing mixer, combine butter (cut into 1 inch cubes and softened) and sugars.  Beat until fluffy.


3.) Add eggs one at a time.


4.) Add vanilla and almond extract, salt, baking soda, cinnamon, and nutmeg.  Mix to combine.

5.) Measure 3 cups rolled oats and add them to the batter slowly.


6.) Add 1 1/2 cups flour.  Mix to integrate; scrape down sides to fully combine.

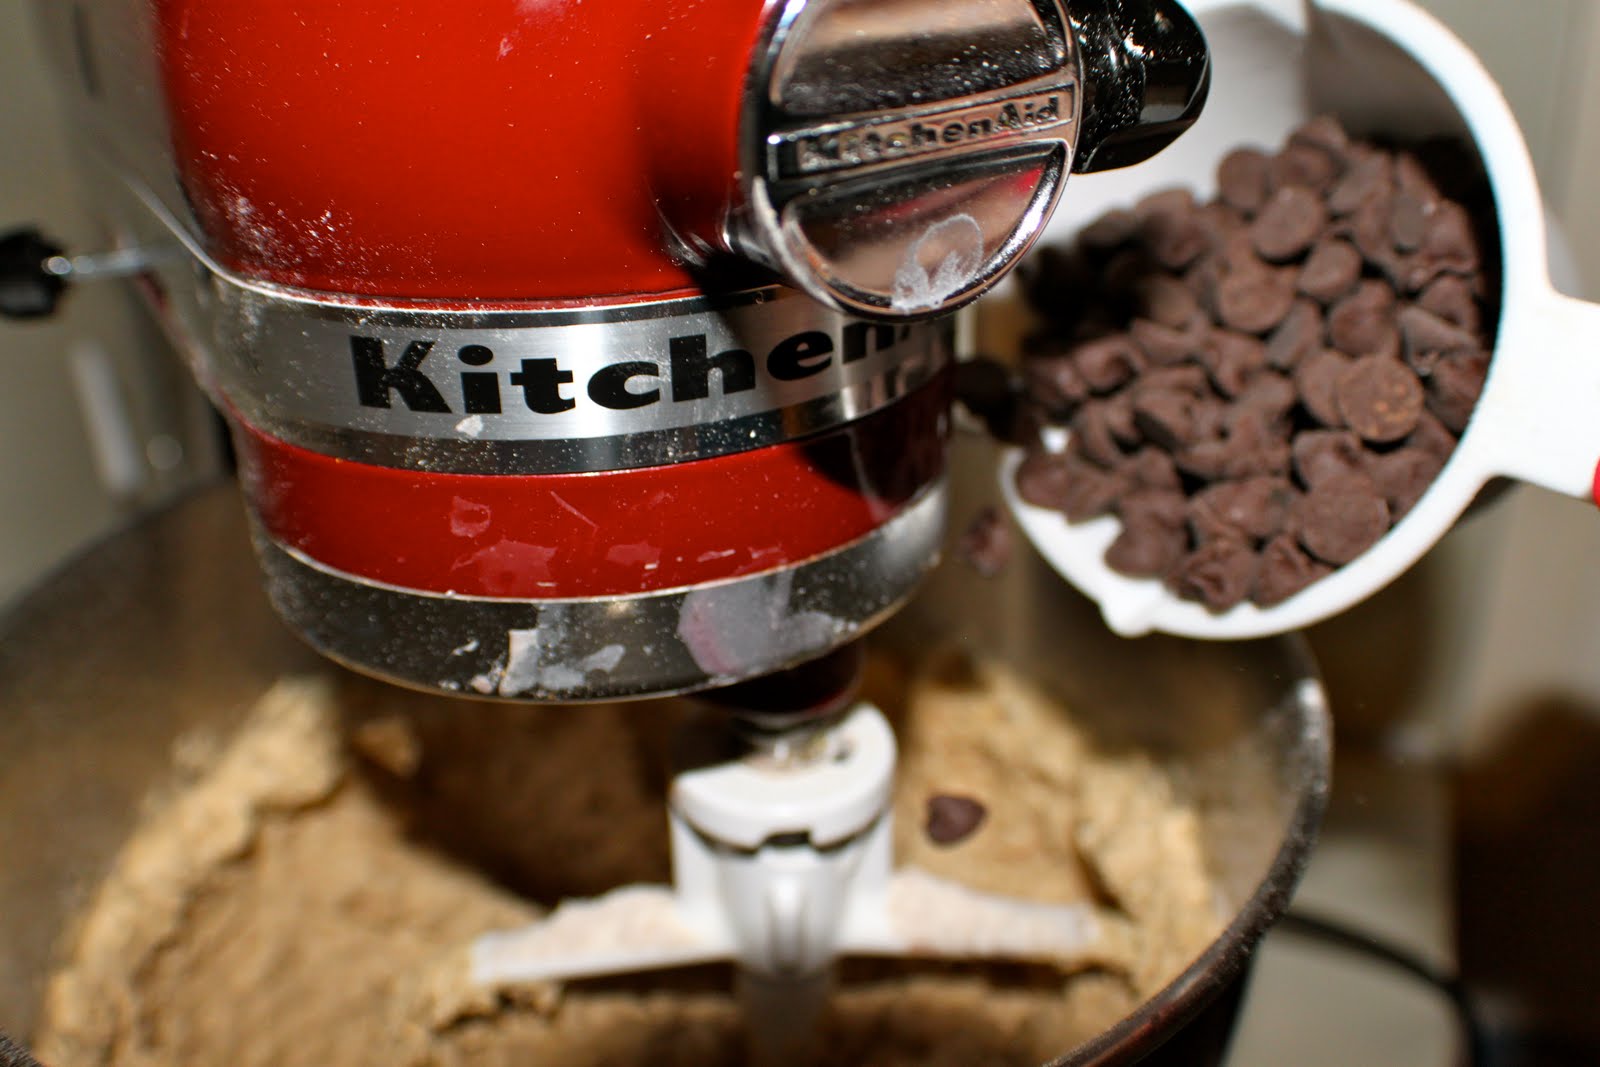
7.) Add 1 12 ounce bag of chocolate chips.


8.) Add 1/2 cup pecans, or walnuts and mix to fully integrate.  Scrape down sides for any leftover dry ingredients and mix one last time.  Remove mixing paddle and bowl from mixer.


9.) Now, begin to dish out your cookies.  The best technique when making cookies of any kind is to use an ice cream scoop as your dough dispenser.  So, scoop out cookie dough evenly and in perfectly spaced dough balls the same way you would ice cream.


10.) Bake in 350F oven for 10 minutes, or until golden brown.  (NOTE: a key tip when making this recipe is that at about 10 minutes, the cookies will be thoroughly cooked, but decently chewy.  Any longer will increase the crispiness of the cookie and run the risk of burning.  Thus, if you prefer crispier cookies, then by all means add a minute or two to the cooking time, but no longer!)

11.) Try not to eat them before transferring them to the plate!


12.) Remove cookies from oven and allow to cool.  Makes about 3 batches at 12 cookies each (36 cookies).  Enjoy!


Subscribe to Clearly Delicious by Email

Tuesday, February 23, 2010

Compost Cookies


Has anyone ever been to Momofuku Bakery in New York City? The bakery is located on 2nd Avenue on the corner or 13th St., and is one of those delicious wonders fusing old time New York with modern international cuisine.  Wait? What does that mean? Well, the great thing about Momofuku, is that much like old time New York, it has a cult following--crooners, locals, businessmen, and other New Yorkers know the bakery.  They eat its "crack pie," "compost cookies" and dine at its milk bar.  Yet, like much of international modern New York, Momofuku comes from an Asian inspired business model with its fantastic in-house hipster chefs who wear brightly colored headbands.  Momofuku is as if Hello Kitty moved to New York circa 1940 and decided to bake some zaney cookies.

What do I love about Momofuku? I love their crazy recipes.  Anyone can make chocolate chip cookies and apple pie, but can they make these traditional recipes from potato chips, pretzels, Fritos, and pounds of chocolate?! Probably not, and that's what I LOVE about Momofuku.  Finally, after much wait, I acquired the recipe for the bakery's most popular cookie, Compost Cookies.  These treats are similar to the "Dump Cookies" of an earlier post, only they demand the addition of salty ingredients like chips and pretzels  making this cookie your ultimate, clearly delicious, salty + sweet desert.

Compost Cookies
Christina Tosi, one of the Momofuku chefs, is credited with making this recipe and you can find her original here.  However, I've made numerous changes to the original (the omision of corn syrup, addition of whole wheat flour instead of all purpose, and an overall change to the heat and cook time).  Also, this recipe calls for 3 cups of filling ingredients--1.5 cups of salty stuff and 1.5 cups of sweet stuff.  You can literally put anything in here for these fillings, but if it's your first time making this recipe, I suggest you keep the salty ingredients in tact whilst playing with the sugary stuff.  Basically, make this for the first time using Fritos, potato chips, and pretzels, but feel free to play with your chocolate chip/sugar combination.

Ingredients:
* 1 cup butter
* 1 cup brown sugar
* 1 cup regular sugar
* 1 teaspoon vanilla extract
* 1 teaspoon almond extract
* 2 large eggs
* 1 3/4 cup whole wheat flour
* 2 teaspoons baking powder
* 2 teaspoons kosher salt
* 1 teaspoon baking soda
* 1 1/2 cups your favorite sweet/chocolatey treats: I used 1/2 cup dark chocolate morsels, 1/2 cup mini chocolate chips, and 1/2 cup cocoa crispies
* 1 1/2 cup salt ingredients: I used 1/2 cup honey mustard pretzels, 1/2 cup regular potato chips, and 1/2 cup Fritos (all of which are crumbled into miniature pieces)

1.)Preheat oven to 350F.  Cream butter and sugars in an electric stand mixer on low.  Make sure to scrape down the sides of the bowl after 2-3 minutes to incorporate all ingredients.
2.) Add and mix wet ingredients--eggs, vanilla, and almond extract. 
3.) Add and mix dry ingredients--baking soda, salt, baking powder, and flour.  Mix on medium-to-low speed and continue to scrape down the sides of your bowl to fully integrate the ingredients.
4.) NOW, the fun part: mix in your favorite fillings by starting with the sweet stuff.  I used chocolate chips, mini chocolate chips, and cocoa crisps.  Add the salty ingredients last (so they don't lose their structural integrity during the mixing process) and scrape down the bowl one last time.
5.) Scoop onto a greased cookie sheet using an ice cream scoop (the tool of any great cookie chef!).
6.) Bake in the oven for 6-8 minutes or until edges are a little more than slightly browned.  For some reason, it's REALLY easy to overcook this recipe in a conventional oven.  The first time I made these, I actually burned 90% of my cookies! It was a travesty--I hadn't burned cookies since I was about 10 years old, so I suggest a serious bit of caution during the cooking process.   I'm still uncertain as to why these cookies overcooked the way they did with my first batch.  Perhaps the original instructions of 400F for 9 minutes was the cause.  SO, bake these at 350F and check at 6 minutes.  You'll be glad you did.  The resulting cookie is soft in the middle with some elements of being crunchy.  YUM.
7.) Remove from oven and allow to sit on the cookie sheet for another minute.  Then, transfer to wax paper, or cooling rack.
8.) Feed to friends and cooking assistants.  Enjoy!


Subscribe to Clearly Dhttp://www.blogger.com/post-create.g?blogID=2643439566887029789elicious by Email

Saturday, January 16, 2010

Dump Cookies Courtesy of My New Kitchenaid Mixer


Have I told anyone it's my birthday? Happy Birthday me! Well, actually, it's not until Monday (Martin Luther King Jr.'s birthday too), but I made sure to celebrate early this year.  What did I give myself? New pens? No, that's what I gave myself last year.  Some iTunes credits? Nope.  Moleskins? Already bought some for the new semester.  A Kitchenaid Mixer? YES!!! Everyone, I'd like to introduce you to my very first kitchenaid mixer.  I have yet to name him/her, much less assign its gender, but after years and years of pining after one, I finally bought the real deal--the industrial strength Kitchenaid Mixer that is essential to any real chef's kitchen (see an upcoming post on Kitchen Essentials in which I discuss the value of a real Kitchenaid Mixer in detail).

After spending an afternoon with Laura today, she casually said, "I could use dessert."  After humming and hawing about possible options--the begnet place around the corner (Coffee Call, hollah!)?, ice cream from the drug store?, a brownie from somewhere, or Sonic for chocolatey goodness? No, we decided that homemade cookies were necessary since I needed to break in the new mixer.

The below recipe is an adaptation of what is often referred to as a "Dump Cookie," a "Monster Cookie," or even a "Compost Cookie" although each of these carries its own variance in the ingredients list.  For this recipe, I'd like to refer to this as a "Dump Cookie a la Recession."  Basically, the concept is very simple--you mix a combination of what you have in the pantry cabinet for baking (chocolate/vanilla/butterscotch/peanut butter chips, nuts, candies, and really anything else you want in this recipe.  Through a combination of whole wheat flour instead of all purpose flour mixed with peanut butter, and almond extract, the resulting cookie is so flavorful that it really takes several bites to taste all of what's going on in there.  This batch yielded about 30 medium-to-large cookies and originally comes from Elise Bauer over at Simply Recipes.  However, my version substitutes the wheat flour, adds almond extract to the vanilla extract combination, and really plays with what the filling ingredients are.  Welcome to Clearly Delicious Dump Cookies a la Recession.

Dump Cookies, Monster Cookies, Cookies a la Recession
One of the truly great things about this kind of cookie is that you can include any ingredient and it will still taste good.  Elise Bauer smartly noted on her food blog that there are certain combinations of Monster Cookies that please adults, others that are popular with children, and so on and so forth.  Below is my own version of this recipe, but I highly suggest looking into Elise's variances here.

*1/2 cup of unsalted butter, room temperature
*1/2 cup of peanut butter, creamy or crunchy
*3/4 cup of granulated sugar
*3/4 cup of brown sugar, packed
*2 eggs, room temperature
*1 teaspoon of vanilla extract
*1 teaspoon almond extract
*1 teaspoon of baking soda
*1 teaspoon of salt
*2 1/4 cups of wheat flour

 Filling:
*1/2 cup of butterscotch chips, optional*
*1/2 cup walnuts, chopped, optional*
*1 cup of White Chocolate Chips, optional*

*Note: all of these ingredients can easily be substituted or played with.  However, you want to keep a 2 cup filling average when substituting.

1.) Preheat oven to 375F.  Add butter and peanut butter to mixer and mix on low speed until fully integrated and creamy.
2.) Add sugars 1/4 a cup at a time on medium speed.  Mix all sugars until light and fluffy.
3.) Add vanilla and almond extract and eggs.  Mix to integrate.
4.) Now add the dry ingredients.  Add baking soda until fully integrated.  Then, add the flour/salt mixture slowly.  Remember, every cook knows that the wet-to-dry ingredient combination is a delicate process and needs to be done the right way.  So, take your time sifting in the dry ingredients to your wet ingredients.  In the words of Alton Brown, "Remember Kids, Speed Kills!" So behave here.
5.) Once you've added your wet and dry ingredients, you should have a basic dough.  Now, add the filling ingredients--chocolate chips, nuts, etc. and mix on low speed to properly integrate.
6.) Lift mixer's head and scrape down bowl and mixing attachment.  Cover metal mixing bowl with seran wrap and refrigerate for about an hour if you have the time.  If you don't, this dough moves easily from fresh batter to pan, so cooking it instantly won't sacrifice the shape or texture of the cookie (probably because of the sturdyness of the wheat flour addition).
7.) Bake on a greased/sprayed cooking sheet for 8-10 minutes or until cookies' edges are light brown.  Cookies should be about an inch apart, and 6 medium-to-large cookies will fit on a standard cookie sheet. Transfer immediately to cooling rack or parchment paper to stop the cooking process.  Enjoy!

Saturday, December 26, 2009

Chocolate Chip Cookies


I have so many memories of making chocolate chip cookies as a kid.  Usually under the guidance of very patient adults and friends of the family (Linda and Lise, you know who you are!), we made batches and batches of America's favorite cookie, and I would chow down on both the batter and the cookies alike.

Today, I am often more inventive with the cookies I bake--I like to experiment with ginger snaps, dump cookies, and dishes that generally require more work.  Yet, when it comes time to make a crowd pleaser, nobody likes a cookie more than chocolate chip cookies! Nor are any recipes as reliable and tasty as a traditional chocolate chip one.  While baking for the holidays, this is exactly the cookie Sarah and I made!


Chocolate Chip Cookies
This recipe comes from the back of a Nestle's Chocolate Chip bag.  The recipe is often referred to as the "Tollhouse Cookie Recipe," and is even the same as the one on the back of the McCormick vanilla extract box.  I've retained the original Nestle's recipe here, but added an extra 3 teaspoons to the vanilla extract.  At first, I assumed McCormick was over-compensating the vanilla for the retail of their product (and, they probably are), but the resulting adding vanilla makes such a yummy difference! Try the recipe for yourself with the regular vanilla (1 teaspoon vanilla extract), or make it with the suggested 4 teaspoons.


Ingredients:
2 1/4 cups all purpose flour (or "plain flour")
tsp Baking soda
tsp Salt
1 cup Butter, or 2 sticks, softened
3/4 cup Granulated sugar
3/4 cup Brown sugar, packed
4 tsps Vanilla extract
2 large Eggs
2 cups, or 1 bag of NESTLÉ TOLL HOUSE Semi sweet chocolate morsels
1 cup Walnuts, chopped (OPTIONAL)

METHOD
1.) Preheat oven at 375 F, and combine dry ingredients: flour, baking soda, salt, and set aside.  You will need the flour mixture to add to the wet mixture.
2.) In a separate bowl (preferably a kitchen aid bowl), beat butter, sugars (both regular granulated and brown), and vanilla extract on low speed until fully integrated and creamy. 
3.) Slowly, add eggs one at a time to the mixture at low speed.
4.) Then, add the dry/flour mixture slowly, and a little bit at a time.  I usually try to eyeball about 1/4-1/2 cup of the dry mixture at a time until fully integrated.  Remember what Alton Brown says, "Speed Kills Kids," so you definitely want to be patient while combining both the wet and dry ingredients.
5.) Finally, stir in the Nestle morsels and chopped nuts (if using chopped nuts), and mix fully on low-medium speed.  You'll probably need to scrape down the sides of the bowl to fully integrate all of the ingredients.
6.) Drop dough by "rounded spoon fulls" onto an ungreased baking sheet.
7.) Bake for 9-11 minutes, or until the edges are golden brown.  Like most baking goods, you'll know the cookie is ready to be removed from the oven when the edges are browned.  If the tops are golden brown, the chances are very high you'll have very dark/burned bottoms to your cookies.
8.) Let sit for two minutes on cookie sheet, and then remove onto a wire rack/parchment surface.  The cookies will continue to cook on the sheet for these two minutes, so don't worry if you think they're just a hair underdone.  Enjoy!