"I want you to make me your Chocolate Almond Cake for my birthday. I've already decided! I'm turning 30, so I get what I want!" my friend Ellen said to me on one of our nightly run/walk/biking/exercise trips. Ellen is fabulous--she's my friend Kris's wife, super cool, super smart, super gorgeous, and pretty much Super Woman (mom, wife, great cook, family administrator, and the list goes on and on. Oh, and she speaks French when she's drunk. She's pretty great). SO, when she tells you she wants something, you do as she says!
Why Ellen would want this cake for her birthday makes complete sense to me: it's my ace up my sleeve, my secret weapon, my culinary super power when dealing with baked goods. It's just that good: moist, dark chocolate cake infused with almonds, and decadent chocolate buttercream icing infused with almonds and layered with shaved almonds. Just writing about it makes me think of the snazzy and tasty presentation this cake always makes.
I made the cake last year for Ellen's 29th birthday and I kept hearing about it for the following 365 days. So this post is specially for Ellen Mecholsky for doing one of the hardest jobs in the world--mother, social acrobat, stellar wife, and exercise companion--all before your 30th birthday! Enjoy this Clearly Delicious chocolate cake!
Chocolate Almond Cake
This recipe is a variation of Elise Bauer's "Suzanne's Chocolate Cake" over at Simply Recipes (you can find it here). I've made numerous changes to the original--transferring out regular Vanilla Extract for Almond Extract, adding Shaved Almonds to the frosting, dividing the layers into 4 (not 3), and a general revision to the order in which ingredients are added during the Beta Stage (get it? Beta? Baking?!) of the cooking process. For my technique, please see below; for Elise's (which is equally as good), see the above link to Simply Recipes.
Ingredients:
--Cake--
* 3 cups all purpose flour
* 1 1/2 tsp salt
* 3/4 tsp baking powder
* 1 1/2 tsp baking soda
* 2 2/3 cup sugar
* 4 extra large, or 5 large eggs
* 1 cup + 2 tablespoons cocoa, unsweetened
* 1 cup + 2 tablespoons water
* 1 cup + 2 tablespoons canola (or vegetable) oil
* 3/4 cup water
* 2-3 tablespoons almond extract
* 1 tablespoon vanilla extract, optional
--Frosting--
* 2 pounds powdered sugar (32 ounces, or 4 cups)
* 1 1/2 cup cocoa, unsweetened
* Almond Extract, to taste
* 2 1/2-3 cups butter (4 sticks), softened, but still firm cut into 1 inch cubes
1.) Preheat oven to 350F. Spray down four 8-10 inch cake pans. Set aside.

2.) Begin by sifting the dry ingredients: salt, baking powder, flour, and baking soda. Sift and set aside.

3.) Now, create the wet mixture with a canola (or vegetable) oil and water base. Mix 1 cup + 2 tablespoons oil with 1 cup + 2 tablespoons water in a Kitchenaid mixer for 2 minutes.

4.) Once oil and water have been mixing for 2-3 minutes, add your eggs, 3/4 cup water, almond (and vanilla if using it) extract; mix on low-medium for 1-2 minutes until fully integrated.

5.) Add sugar and cocoa. Mix until integrated making sure to scrape down the edges of your bowl.
6.) Now, add the dry ingredients slowly until fully integrated. Make sure to scrape down the sides during the mixing process so that all of your dry ingredients and wet ingredients mix properly.

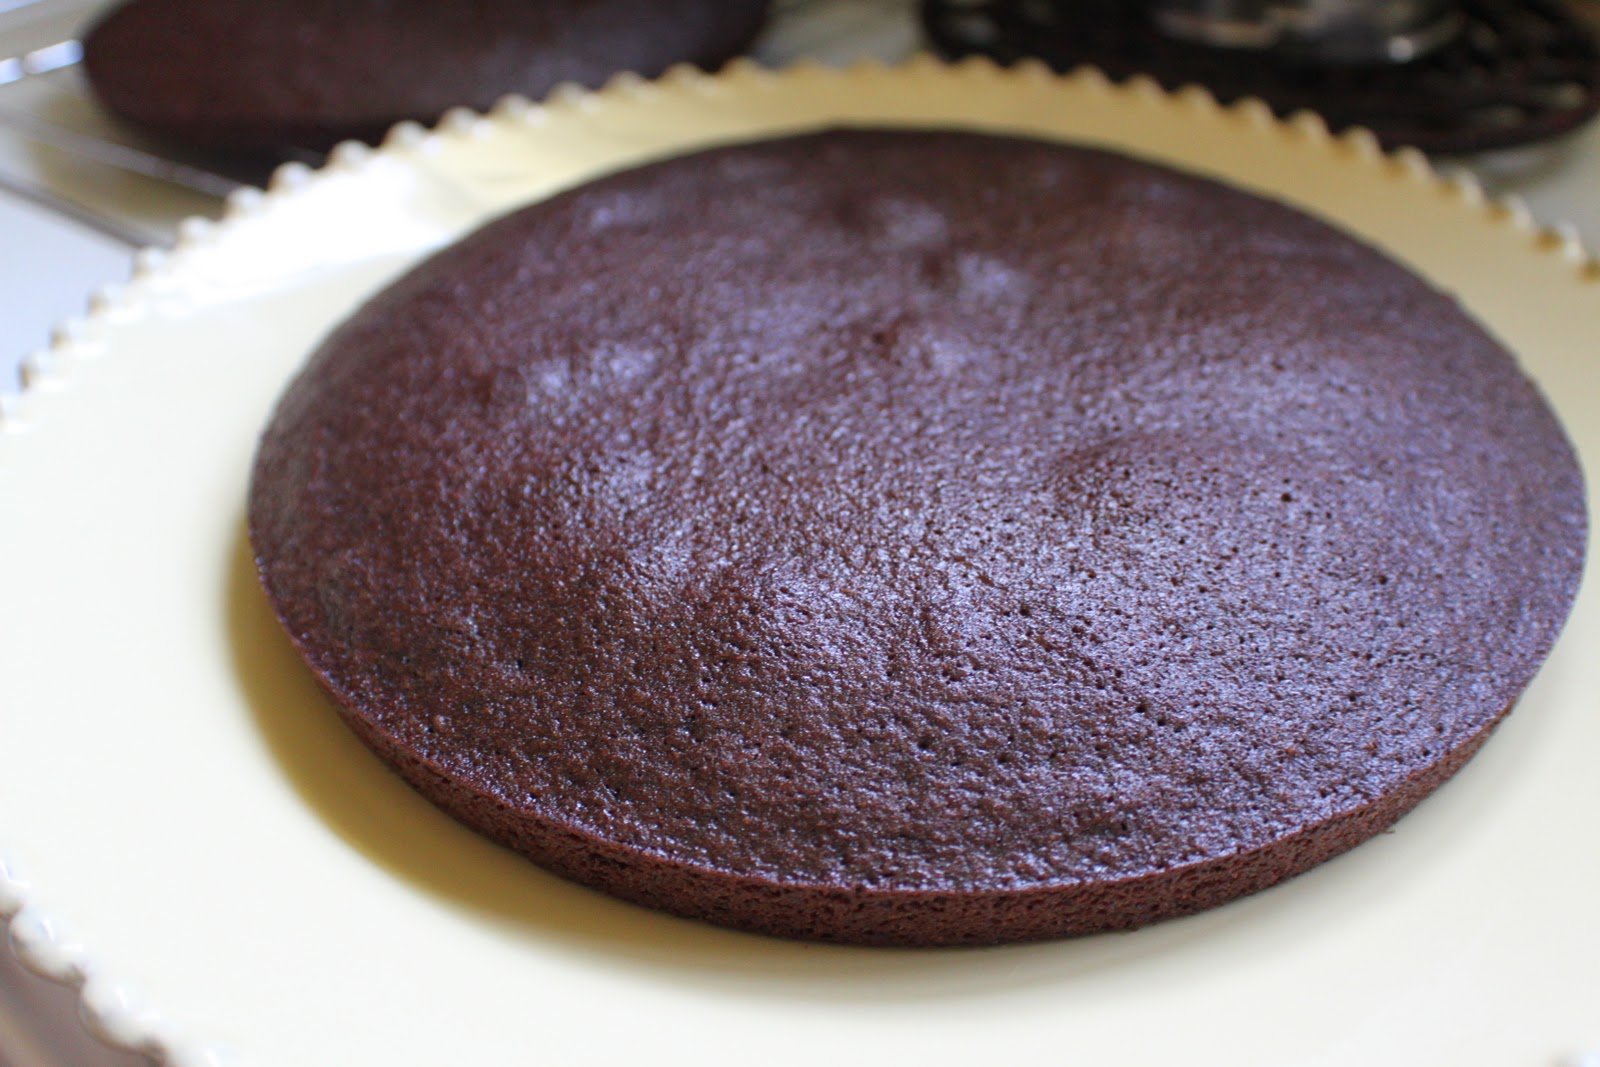
7.) Now you're ready to pour the batter into the cake pans. Pour batter evenly into four 8-10 inch cake pans and shake to smooth. Bake for 20-25 minutes, or until a knife comes out clean. Transfer to cooling rack and allow to cool.

Frosting:
1.) Once cake has thoroughly cooled (the cake should not be warm to the touch), prepare the icing.
2.) Cut 4 sticks of butter into one inch cubes and add to your Kitchenaid Mixer.

3.) Add 1 1/2 cups cocoa, and turn on low speed to integrate.
4.) Drizzle in 1-2 tablespoons almond extract; slowly add 4 cups powdered sugar.
5.) Once powdered sugar is integrated, slowly add 1/4 cup or more of water until frosting is the consistency you like. Adjust flavor with more almond extract.
6.) Scrape down sides of bowl and mix one last time. You are now ready to frost the cake!

Cake Construction:
1.) Begin by laying the flattest layer on a serving dish.
2.) Frost entirely.

3.) Take second flattest layer upside down on top. Frost thoroughly and place third layer on top.

4.) Frost next layer: here's a tip on frosting a cake fast & effectively: take a large spoon/dollop of icing and plop it onto the layer you're about to ice. Spread evenly over the surface of the layer working your way to the sides. The dollop technique is one used by professional bakers and is the most effective way to ice a cake without constantly adding more icing and getting patches of uneven frosting.

5.) Finish icing top layer and smooth sides making sure that any gaps between the layers (there will definitely be some!) are filled in with icing.

6.) Add almonds. Another note: technique is crucial here to getting cleanly applied almonds around the sides. Take a handful of almonds and sift them in the palm of your hand so that they are as evenly dispersed in your palm as possible. Take palm and "slap" them onto the sides of the cake. Once you've applied all the almonds from your hand, wash hands and continue doing this same step all around the edges of the cake. This is a long process as it requires constantly washing your hands--any chocolate frosting that sticks to your hands WILL get on the almonds and make the job/process harder than it should be. It will also make the almonds look chocolatey/messy, and take away from the cake's presentation. However, whatever almonds don't stick will fall to the base of the cake (which is fine); make sure to use fallen almonds to hand apply to empty spots.
When you're done, you want the cake's almond layer to be clean. They should look this:

7.) Serve to awesome birthday friend:

8.) Give some to her daughter:

9.) And don't mind the finger-prints. The cake is still Clearly Delicious!

Subscribe to Clearly Delicious by Email