Sunday, July 4, 2010
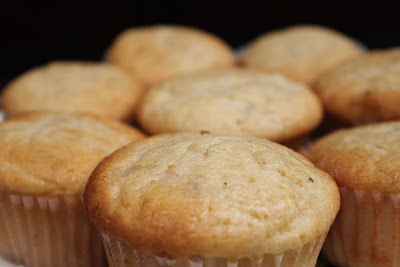
Lemon Lavender Muffins
"Oh! I have something for you!" Laura said to me last week. After rushing to her car, she came back with a small ziplock bag with herbs inside it. I'm going to be honest, the bag looked...well...a bit sketch. I didn't quite know what to expect from her impromptu present. "Thanks" I said hesitatingly. "Smell it!" she exclaimed.
I smelled it.
"LAVENDER!!!" I immediately squealed. "Where'd you get this?!"
"My next door neighbor recently returned from France with all of these fresh herbs from an open market in Savoy."
And that, my readers, is how the recipe for Lemon Lavender Muffins was born. It was not an easy journey to make this recipe; I kept wondering about what I should make with my 2 tablespoons of fresh French lavender. Lavender Infused Olive Oil? Lavender Ice Cream? But this recipe seemed just right.
Use fresh lavender from your garden (or from Savoy if you're so lucky!) for a lemon muffin with a certain "je ne sais quoi" about it.
Lemon Lavender Muffins
This recipe is a variation of the lemon quick bread recipe by Elise Bauer over at Simply Recipes (the original can be found here). I've made several changes to the ingredients and techniques: one, I've switched out Elise's suggestion for cardamom for fresh lavender, two, I've add lemon zest and juice to the batter, and three, I've waited until the bread is "cooled" when adding the glaze.
Ingredients:
* 1 stick butter, softened and cut into 1 inch cubes
* 1 cup minus 1 tablespoon granulated sugar
* 1 tablespoon honey
* 2 eggs
* 1 tablespoon lemon zest + 1 tablespoon lemon juice
* 1/2 teaspoon salt
* 1/2 cup milk
* 1 1/2 cups flour
* 2 teaspoons fresh lavender, ground
* 1 teaspoon baking powder
Lemon Glaze
* 1/3 cup sugar
* 1/4 cup lemon juice
* 1 tablespoon honey
Special Equipment Needed:
* 1 coffee grinder for grinding the lavender
1.) Preheat oven to 350F. Line a 12 muffin pan with cupcake paper.
2.) Measure 1-2 teaspoons lavender.
3.) Grind in a coffee grinder.
4.) Cut 1 stick butter into 1 inch cubes and soften (30 seconds in the microwave will do).
5.) Add to standing mixer such as a Kitchenaid and turn on low speed. Mix for 1-2 minutes, or until butter is fluffy.
6.) Add sugar and mix to integrate. Add eggs one at a time.
7.) Add salt, baking powder, lavender, lemon zest, and lemon juice. Mix on low to integrate.
8.) Add flower slowly until fully mixed in. Stop mixer to scrape down sides and mix one last minute.
9.) Pour batter into muffin pan.
10.) Bake for 15-20 minutes, or until tops are golden brown and a toothpick comes out clean.
11.) Remove from oven and transfer to a cooling pan.
12.) Once muffins are cooled, create the lemon glaze: combine 1/4 cup lemon juice with 1/3 cup sugar and 1 tablespoon honey. Whisk to properly integrate.
13.) Puncture holes throughout tops of the muffins using a small toothpick. Pour glaze over tops of muffins. It's good to do this last step over a plate that you don't plan on serving the muffins on as you will have lots of glaze pouring off onto the plate. Clean up any puddling that may happen around the muffins and clean muffin bottoms. Transfer to a serving plate and enjoy! Makes 12.
Subscribe to Clearly Delicious by Email
Labels:
baked goods,
bakery,
easy,
france,
lavender,
muffins,
quick bread,
savoy,
savoy lavender
Saturday, July 3, 2010
Chicken potpie. A dish that many of us never make ourselves, or have ever had made for us homemade. But the real tragedy in the world of chicken pot pie is that many of us have been exposed to the dish through the freezer section of our local grocery stores, or the not-so-homemade phenomenon of places like Cracker Barrel (I'm not hating on Cracker Barrel, I'm just saying....). If we're lucky, the restaurant and frozen potpies we buy may taste kind of good, but are seldom layered in the kinds of flavors a real homemade recipe pulls together.
This kind of praise aside, I must admit, this is not an easy recipe, a quick recipe, or a recipe for starters. This chicken potpie recipe is a recipe that, if done in its entirety, takes several hours to make and lots of focus, but has one of the tastiest of outcomes. It consists of a homemade pie crust, homemade chicken broth and subsequent filling, and lots of fresh ingredients.
When I first got to Asheville for the holidays, I made this recipe for Joe, his family, and his friends. I spent about three-to-four hours in the kitchen with the help of his younger sister Sarah (holla!) and the result was, as both of Joe’s parents stated, “divine” (very possibly the best compliment my cooking’s ever gotten!).
Chicken Potpie
The below recipe is in its entirety. However, you can easily cut corners with the chicken broth, the pie crust, and the preparation of the meats. Oftentimes, I prepare the pie crust a day ahead of time and refrigerate it so that all I have to do is roll it out when it’s time to put the pie together. Additionally, the chicken can easily be substituted with leftover turkey after Thanksgiving, and the broth can be regular chicken broth from the store.
Ingredients
Chicken and stock ingredients
* 1 (3 ½-4 lb) chicken (i.e., a “frying chicken”)
* 1 carrot
* 1 celery stalk
* 1 small onion, halved and separated
* 2 teaspoons salt
* 1 (3 ½-4 lb) chicken (i.e., a “frying chicken”)
* 1 carrot
* 1 celery stalk
* 1 small onion, halved and separated
* 2 teaspoons salt
Pie crust ingredients
NOTE: this makes enough pie crust for four discs, or two pies. It can easily be halved. Also, many pie crusts call for Crisco/lard instead of all butter. Although the resulting flaky texture may be just that—awesome and flaky—the resulting flavor is way less tasty. Remember what the wise Julia Childs once said: “You can never have too much butter.”
* 5 cups all-purpose flour
* 2 teaspoons salt
* 5 cups all-purpose flour
* 2 teaspoons salt
* 2 heaping teaspoons of brown sugar
* 4 sticks of butter frozen, or chilled
* 10-15 tablespoons ice water
* 4 sticks of butter frozen, or chilled
* 10-15 tablespoons ice water
Filling ingredients
* 6 Tbsp unsalted butter
* 1 large onion, diced (about 1 1/4 cups)
* 3 carrots, thinly sliced on the diagonal
* 3 celery stalks, thinly sliced on the diagonal
* 1/2 cup all-purpose flour
* 1 1/2 cups milk (regular, 2 %, or skim all work fine)
* 1 teaspoon chopped fresh thyme leaves (can use dried thyme as well)
* 1/4 cup dry sherry (“cooking sherry”)
* 3/4 cup green peas, frozen or fresh, boiled
* 2 tablespoons minced fresh parsley
* 2 teaspoons kosher salt
* 1/2-1 teaspoon freshly ground black pepper
Egg wash
* 1 egg whisked with 1 Tbsp water
* 1 egg whisked with 1 Tbsp water
Special equipment needed
* 6-8 10-ounce ramekins
* 6-8 10-ounce ramekins
OR: 2 regular pie pans (i.e., 10 inch pie pans)
PIE CRUST
1.) First, prepare the pie crust and refrigerate. See Post on All Butter Pie Crust for more Information.
CHICKEN STOCK AND FILLING
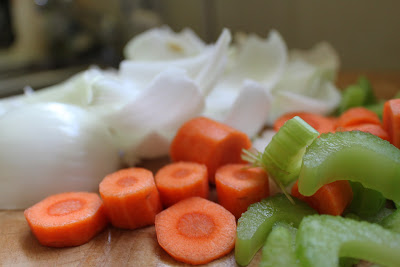
1.) Cook the chicken and the chicken stock. Begin by prepping your vegetables--chop onion, celery, and carrots.
1.) Cook the chicken and the chicken stock. Begin by prepping your vegetables--chop onion, celery, and carrots.
2.) Wash and clean the chicken, add to a large pot, and fill with water until it just barely covers the chicken. Add the carrot, celery, and onion (the onion should be broken into pieces from the half). Add the salt. Bring to a boil on medium-high heat, and then turn down to medium-low and simmer for 45 minutes to an hour (45 minutes for a 3.5 lb chicken, and 45 minutes for a 4 lb. chicken).
3.) Once the chicken is cooked, remove from pot and place in a cooling pan for about 15 minutes. Allow the broth to continue boiling until it has reduced to about a quart. Reserve 2 1/2 cups broth for the filling. You will have plenty to reserve and cook with other dishes!
4.) Once the chicken is cool enough to touch and pick clean, do just that. Remove all of the chicken, and reserve for the filling. NOTE: As you're picking the chicken clean, feel free to put the chicken's bones back into the broth as the stock continues to boil. You will definitely get added flavor from this process!
CHICKEN POT PIE FILLING
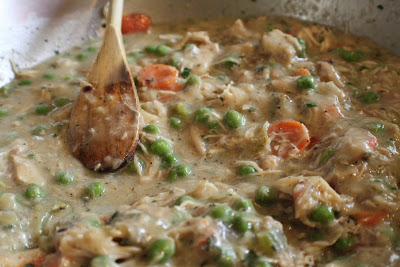
1.) Preheat oven at 400 degrees F. In a large skillet, melt the butter, and add celery, carrot, and onions. Cook the vegetables until they are translucent (about 10 minutes or longer depending on how high you have your heat set).
3.) Whisk/stir in 2 1/2 cups chicken stock. Whisk in the milk. Decrease the heat to low, or medium-low and stir occassionally for about ten minutes.
4.) Add the final ingredients: the reserved chicken, thyme, salt and pepper, cooked peas, parsley, and stir well. NOTE: These will probably not be the final touches you add to this mixture. Taste the filling and add salt, pepper, and thyme accordingly. When I last made this recipe, we decided a little extra thyme was what was missing, but it depends from preparation to preparation.
MAKING THE PIE
1.) Roll out two discs of dough (one for each pan) on a floured surface, and pour half of the mixture into each pie pan. If using ramekins (as shown below), pour filling into individual ramekins and use rolled pie dough for tops.
2.) Roll out the remaining two discs of dough and flop onto the top of the pie. If using ramekins, use a biscuit cutter (or inverted drinking glass) to cut out circles for the tops of the pot pies.
3.) Curl the crust on top of itself, or fork for a design. Cut X's, or lines across the pie crust top for design and to let the pie breathe when cooking. If using ramekins (as below), layer pie crust cutouts. Don't worry if they don't look "perfect" in the Beta stage; they will cook together and look crispy and fantastic when done.
4.) Prepare the egg wash: mix one tablespoon of milk with one whisked egg, and brush on top of the pie crusts.
5.) Cook for about 25 minutes, or until the crust is golden brown. Full batch makes 8 ramekins, or 2 pies. Enjoy!
Subscribe to Clearly Delicious by Email
Labels:
baked goods,
bakery,
chicken,
chicken broth,
chicken stock,
comfort food,
potpie
Friday, July 2, 2010
Chocolate Bourbon Cake
There's something about a chocolate cake infused with alcohol--usually bourbon whiskey--that just wreaks of classiness. Maybe it's the bourbon I smell, but I smell classy.
It's no surprise, then, that this recipe comes from The New York Times food and dining section circa 2008. I always go to the NYT recipe section for innovative food ideas and this bourbon-infused cake has innovative down.
As innovative as it may be, my friend John refers to the this recipe as the "alchy cake" where "each bite is like taking a shot." So bakers beware: for as much chocolate as this cake is packing, it's also packing a significant amount of booze. However, since this cake is a bit on the boozy side, feel free to reduce the whisky from 1 cup to 3/4 of a cup or 1/2 of a cup for less of the alcohol content based on your taste preferences. The cake will bake just fine with less alcohol (it'll be denser), but you should definitely bake it with some bourbon.
Chocolate Bourbon Cake
This recipe comes from the New York Times food and dining section (the original can be found here). But, I must give a shout out to Ms. Elise Bauer over at Simply Recipes for trying and cataloguing said recipe; and thus, verifying its deliciousness. For Elise's version of the recipe, see here.
Ingredients:
* 2 sticks butter, softened
* 2 cups all purpose flour
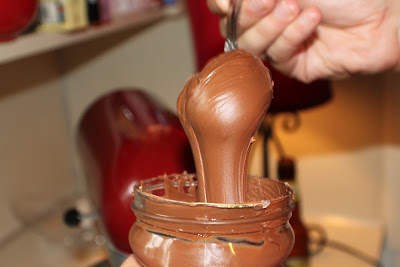
* 5 ounces quality dark chocolate, melted (can substitute with 5 ounces Nutella)
* 2 tablespoons cocoa powder, unsweetened
* 1/4 cup instant espresso, coffee, or regular coffee
* 1 cup bourbon whiskey (can use 3/4 cup or 1/2 cup depending on preferences)
* 1/2 tsp kosher salt
* 2 cups sugar
* 3 large eggs
* 1 tsp vanilla extract
* 1 tsp baking soda
* 1/4 cup confectioner's sugar, for sprinkling
1.) Preheat oven to 325F. Grease a 10-12 cup bundt pan.
2.) Add cocoa powder, instant coffee to a heat-safe measuring cup and add boiling water to the 1 cup fill line. Allow to cool.
3.) Add salt and 1 cup whiskey bourbon (or lesser amount depending on your preference). Stir well to integrate.
4.) Beat butter (softened) for 2-3 minutes in a Kitchenaid mixer, or until fluffy. Add sugar and mix fully; add eggs 1 add a time allowing for each one to be properly mixed in after each addition.
5.) Add vanilla extract, baking soda, and melted chocolate (can use Nutella here if you don't have high quality dark chocolate). Mix to integrate.
6.) Now, add the wet mixture--whiskey/coffee/cocoa--and the dry mixture to your butter batter by doing 1/3 of each at a time, but back and forth. Start by adding 1/3 of the whiskey mixture, then 1/3 of the 2 cups flour.
7.) Now add the second third of the whiskey mixture and second third of the 2 cups of flour. Continue until all ingredients are fully integrated.
7.) Once batter is fully integrated, scrape down the sides of your bowl to add any leftover dry ingredients. Mix one last time and pour into a 10-12 cup bundt pan.
8.) Bake in oven at 350F for 45 minutes or more, or until a knife comes out clean. Remove from oven and allow to cool for 5 minutes before transferring cake to a plate.
9.) Sprinkle with powdered sugar and fresh bourbon whiskey; makes 12.
Subscribe to Clearly Delicious by Email
Labels:
bourbon,
chocolate,
cocoa,
New York Times,
nutella,
Simply Recipes,
whiskey bourbon
Thursday, July 1, 2010
Chocolate Almond Cake
"I want you to make me your Chocolate Almond Cake for my birthday. I've already decided! I'm turning 30, so I get what I want!" my friend Ellen said to me on one of our nightly run/walk/biking/exercise trips. Ellen is fabulous--she's my friend Kris's wife, super cool, super smart, super gorgeous, and pretty much Super Woman (mom, wife, great cook, family administrator, and the list goes on and on. Oh, and she speaks French when she's drunk. She's pretty great). SO, when she tells you she wants something, you do as she says!
Why Ellen would want this cake for her birthday makes complete sense to me: it's my ace up my sleeve, my secret weapon, my culinary super power when dealing with baked goods. It's just that good: moist, dark chocolate cake infused with almonds, and decadent chocolate buttercream icing infused with almonds and layered with shaved almonds. Just writing about it makes me think of the snazzy and tasty presentation this cake always makes.
I made the cake last year for Ellen's 29th birthday and I kept hearing about it for the following 365 days. So this post is specially for Ellen Mecholsky for doing one of the hardest jobs in the world--mother, social acrobat, stellar wife, and exercise companion--all before your 30th birthday! Enjoy this Clearly Delicious chocolate cake!
Chocolate Almond Cake
This recipe is a variation of Elise Bauer's "Suzanne's Chocolate Cake" over at Simply Recipes (you can find it here). I've made numerous changes to the original--transferring out regular Vanilla Extract for Almond Extract, adding Shaved Almonds to the frosting, dividing the layers into 4 (not 3), and a general revision to the order in which ingredients are added during the Beta Stage (get it? Beta? Baking?!) of the cooking process. For my technique, please see below; for Elise's (which is equally as good), see the above link to Simply Recipes.
Ingredients:
--Cake--
* 3 cups all purpose flour
* 1 1/2 tsp salt
* 3/4 tsp baking powder
* 1 1/2 tsp baking soda
* 2 2/3 cup sugar
* 4 extra large, or 5 large eggs
* 1 cup + 2 tablespoons cocoa, unsweetened
* 1 cup + 2 tablespoons water
* 1 cup + 2 tablespoons canola (or vegetable) oil
* 3/4 cup water
* 2-3 tablespoons almond extract
* 1 tablespoon vanilla extract, optional
--Frosting--
* 2 pounds powdered sugar (32 ounces, or 4 cups)
* 1 1/2 cup cocoa, unsweetened
* Almond Extract, to taste
* 2 1/2-3 cups butter (4 sticks), softened, but still firm cut into 1 inch cubes
1.) Preheat oven to 350F. Spray down four 8-10 inch cake pans. Set aside.
2.) Begin by sifting the dry ingredients: salt, baking powder, flour, and baking soda. Sift and set aside.
3.) Now, create the wet mixture with a canola (or vegetable) oil and water base. Mix 1 cup + 2 tablespoons oil with 1 cup + 2 tablespoons water in a Kitchenaid mixer for 2 minutes.
4.) Once oil and water have been mixing for 2-3 minutes, add your eggs, 3/4 cup water, almond (and vanilla if using it) extract; mix on low-medium for 1-2 minutes until fully integrated.
5.) Add sugar and cocoa. Mix until integrated making sure to scrape down the edges of your bowl.
6.) Now, add the dry ingredients slowly until fully integrated. Make sure to scrape down the sides during the mixing process so that all of your dry ingredients and wet ingredients mix properly.
7.) Now you're ready to pour the batter into the cake pans. Pour batter evenly into four 8-10 inch cake pans and shake to smooth. Bake for 20-25 minutes, or until a knife comes out clean. Transfer to cooling rack and allow to cool.
Frosting:
1.) Once cake has thoroughly cooled (the cake should not be warm to the touch), prepare the icing.
2.) Cut 4 sticks of butter into one inch cubes and add to your Kitchenaid Mixer.
3.) Add 1 1/2 cups cocoa, and turn on low speed to integrate.
4.) Drizzle in 1-2 tablespoons almond extract; slowly add 4 cups powdered sugar.
5.) Once powdered sugar is integrated, slowly add 1/4 cup or more of water until frosting is the consistency you like. Adjust flavor with more almond extract.
6.) Scrape down sides of bowl and mix one last time. You are now ready to frost the cake!
Cake Construction:
1.) Begin by laying the flattest layer on a serving dish.
2.) Frost entirely.
3.) Take second flattest layer upside down on top. Frost thoroughly and place third layer on top.
4.) Frost next layer: here's a tip on frosting a cake fast & effectively: take a large spoon/dollop of icing and plop it onto the layer you're about to ice. Spread evenly over the surface of the layer working your way to the sides. The dollop technique is one used by professional bakers and is the most effective way to ice a cake without constantly adding more icing and getting patches of uneven frosting.
5.) Finish icing top layer and smooth sides making sure that any gaps between the layers (there will definitely be some!) are filled in with icing.
6.) Add almonds. Another note: technique is crucial here to getting cleanly applied almonds around the sides. Take a handful of almonds and sift them in the palm of your hand so that they are as evenly dispersed in your palm as possible. Take palm and "slap" them onto the sides of the cake. Once you've applied all the almonds from your hand, wash hands and continue doing this same step all around the edges of the cake. This is a long process as it requires constantly washing your hands--any chocolate frosting that sticks to your hands WILL get on the almonds and make the job/process harder than it should be. It will also make the almonds look chocolatey/messy, and take away from the cake's presentation. However, whatever almonds don't stick will fall to the base of the cake (which is fine); make sure to use fallen almonds to hand apply to empty spots.
When you're done, you want the cake's almond layer to be clean. They should look this:
7.) Serve to awesome birthday friend:
8.) Give some to her daughter:
9.) And don't mind the finger-prints. The cake is still Clearly Delicious!
Subscribe to Clearly Delicious by Email
Wednesday, June 30, 2010
Orange Oil w/Waldborg Star Date Balsamic Vinegar Dressing & Salad
When I was in New Orleans this past weekend, Michael took me to that glorious Olive Oil & Fruit Vinegar import store Vom Fass (of which I've already written). It was extraordinarily hard to decide what kinds of fruit vinegars and olive oils to buy--there were so many flavors and I wanted them all!--but with one suggestion, I knew I could make my decision.
"We had a date vinegar and orange oil salad dressing tasting this weekend" Nick, the store representative, said. "It was like eating candy!" I was sold.
Below is my version of Nick's recipe based off of what he said. The dressing supposedly had a 3:2 parts ratio (3 parts orange oil with 2 parts date vinegar). But, after making a large salad, I felt it really should have been a 1:1 ratio (i.e., 3 parts orange oil with 3 parts vinegar) to get the taste I was going for. Make with the same oil/vinegars I use here buy ordering from the Vom Fass website, or make your own through homemade infusions for a salad dressing that is clearly delicious.
Orange Oil w/Waldborg Star Date Balsamic Vinegar Dressing & Salad
The key to making this recipe taste "like candy" is to add the olive oil and vinegar separately to the salad. A lot of people mix and shake their oil and vinegar salad dressings beforehand, but I'm a purist. I believe in adding the orange olive oil first and then the waldborg star date balsamic vinegar second to the salad.
Ingredients:
* 1 large salad (4 servings), prepared (see "Fall Salad" recipe for an example recipe)
* 3 tablespoons Orange Olive Oil
* 3 tablespoons Waldborg Star Date Balsamic Vinegar
* 1 orange, zested
* 1/2 cup dates
1.) Prepare salad, and add 1/2 cup dates.
2.) Drizzle 3 tablespoons of Orange Olive Oil over the salad.
3.) Drizzle 3 tablespoons of Waldborg Star Date Balsamic Vinegar over the salad.
4.) Zest an orange over the salad.
6.) Dish out servings of salad (makes 4) and serve with more freshly zested orange on top. Enjoy!
Subscribe to Clearly Delicious by Email
Subscribe to:
Comments (Atom)


